- 0116 5020019
- Help@chessgammon.co.uk
- Over 20,000 fulfilled orders


The Rook is a very powerful chess piece when utilised in the correct way. The piece not only has the same range of movement as the bishop, but it can also be placed on a square of any colour. This allows the piece to be a bit of a dark horse in certain plays, as it is often underestimated. Its relative value is equal to five pawns and typically, two rooks can even equate to the value of a queen piece itself.
The Rook is commonly referenced as the castle or tower piece, names often derived from the looks of various themed chess sets produced in the 18th and 19th centuries. Below we have set examples and diagrams for you to follow in order to give you the perfect insight into the characteristics of a Rook, from an experienced chess player.

Now that we know where the rooks actually start out, we can start to talk about the value of the rook and what it means to protect this piece in an advancing game.
As mentioned earlier, the Rook is a vital piece to use for attack, but must also be carefully protected. Given this piece holds the value of 5 points, it is one of the second most valuable pieces on a chess board. Therefore, the opposition Rook should be targeted but not at the expense of your own; this makes it essential for a chess player to know exactly how to utilise the Rook for attack when you have the chance.
Grandmasters use the rook as a long-range move to eliminate a distant piece or potentially save a more valuable piece such as the queen (9 points), when threatened.
Castling is an extremely efficient move that involves the King and the Rook. The Rook, positioned on the side of the King, is effectively called the ‘Kingside’ Rook and likewise the same for Rook on the sid eof the Queen being called the ‘Queenside’ Rook. This move allows both the King and Rook to simultaneously move next to eachother as a single move.
Castling allows for the rook to be positioned more centrally and was designed to speed up the game. In turn, this allows the King to be further protected. There are a couple of stipulations in order to conduct this move.
Firstly, there should be no other chessmen in-between the respective Rook and King. Secondly, the Rooks and the King are still in their initial position in order for the move to be conducted. Lastly, the King cannot move out of check with this move or move into a check whilst the move is conducted. As long as these conditions are met, castling may occur.

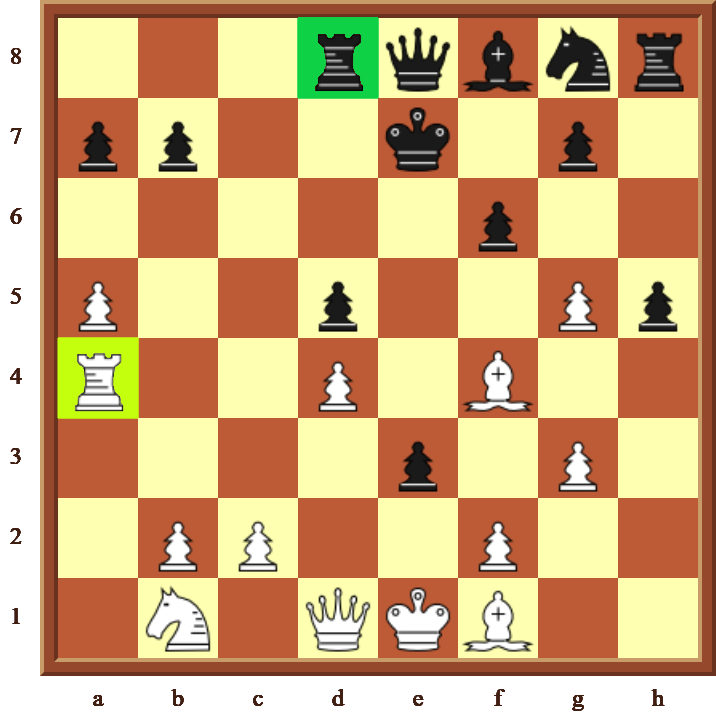
To put all these tips into play, lets firstly recap exactly how the rook works in a basic game of chess. The rook works in a very simple way; it can move in straight lines, either vertically or horizontally on the chess board. The rook can move both forwards and backwards and therefor, has a huge range of movement. So how can a piece so basic win an entire chess game? Well to know this, we must first explore its manoevres.

In this case, our aim is to make further space for the rook to be in better play against an opponent piece. However, at times, keeping this piece in place can be wiser so that it can be utilised later when the opponents’ playing field is open and vulnerable.
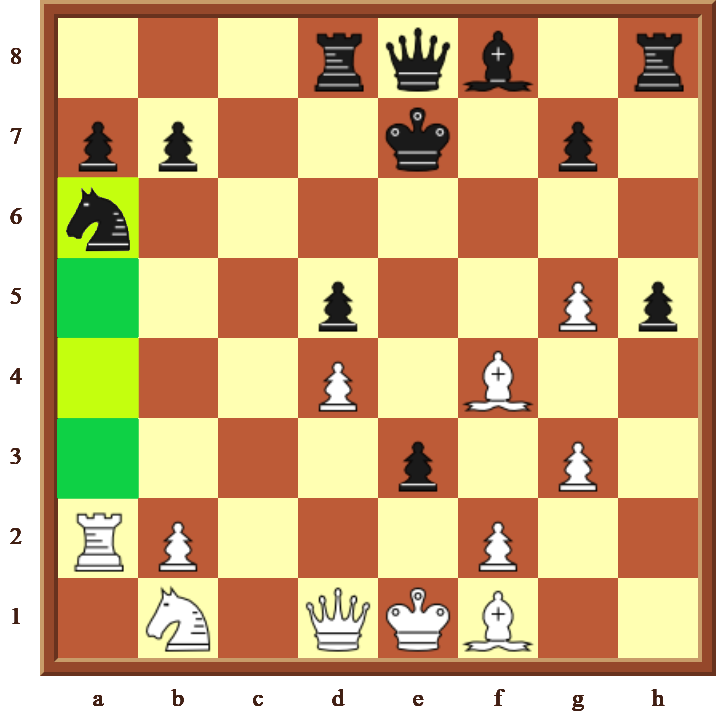

Now to the answer the million-dollar question. We already know just how valuable the Rook piece can be as an underdog; the piece can effectively change the game in a matter of moments, leaving your opponent completely blind-sided. The fact the Rook moves so swiftly up and down the board allows for valuable pieces to be eliminated, if the opponent is not paying attention.
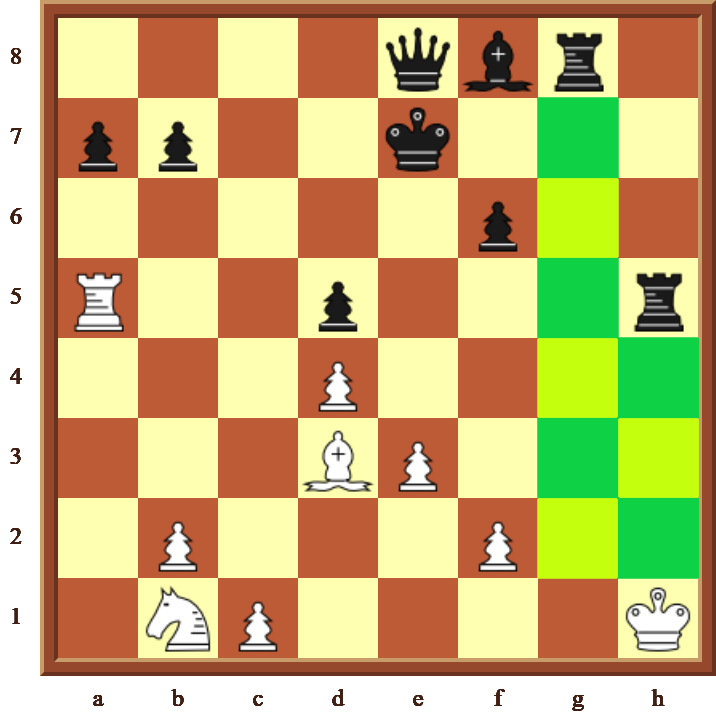

Another example is a back-rank check mate (also known as the corridor mate) which often gets a player at the start of a chess game. The move works by trapping the King, as seen in the diagram above. This can very easily occur behind pawns at the beginning of a game if there is a clear passage for the rook to attack.
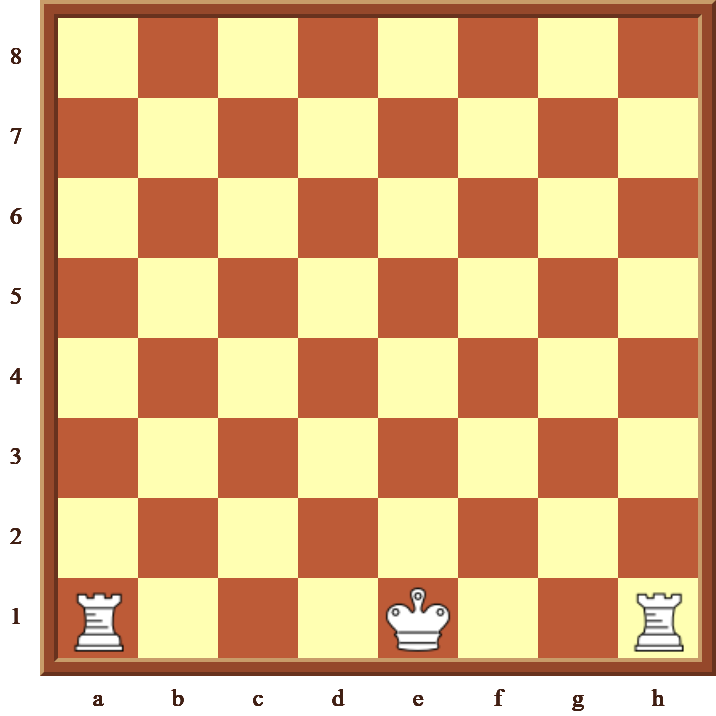
So what can you do if there’s absolutely no piece to play with besides the rook itself and of course, your own King? you are playing a very intense game of chess that has lasted until only the two kings and your rook is left behind. The question now is, how can you swiftly win this game, instead of ending on a stalemate.
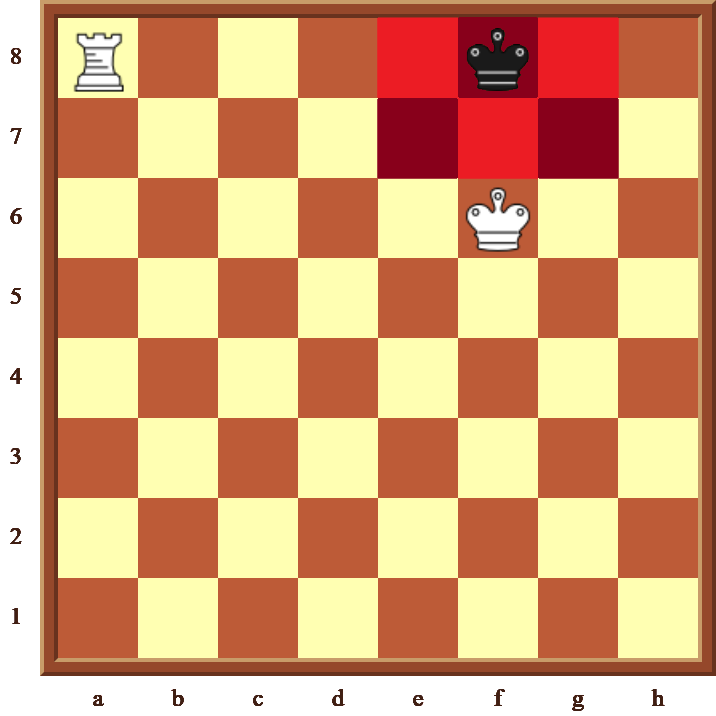
Here we can see that once we drive the opponents King to edge of the board and restrict it’s movement, this is when we can attack and call a checkmate. The black King has been blocked completely and isolated to the side of the chess board.
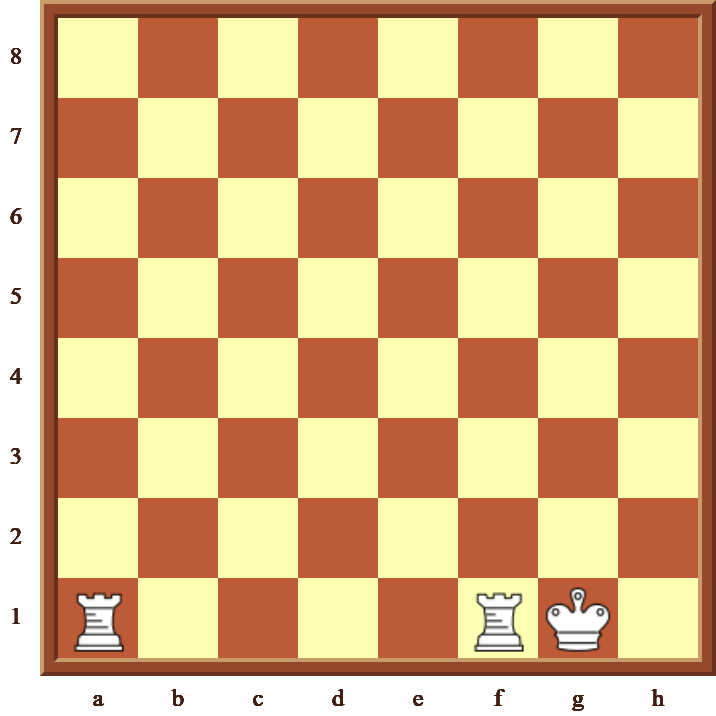
The Box
The first step is to put the opponents King inside a box. The Rook is able to move both horizontally and vertically, as we know, and for a piece such as the King which can only take single steps at a time, this can be an advantageous play by forcing the King into a box that keeps getting smaller and smaller. Here are some diagrams to show what we mean by this:

The Stare
Once you have formed a border around the opponents King, the next step is to face the opposition King using your King. Stare directly in front pushing the King backwards. Remember, our aim is to keep pushing the opponents King back towards the edge of the board. If they move backwards at this stage, we keep advancing closer. Firstly, using our Rook to box the opponent off in an even smaller box and then use our King to stare.


We are now in the exact same position as we were before however the box is now smaller and the opponent King is closer to the edge, this is exactly what we want. You must keep the box steady and keep patiently manoeuvring your King stare until the opponent is forced to retrieve. If the opponent makes a move creating a stare in front of you, then use your next move to check them with your rook. This will leave them no choice but to retrieve.
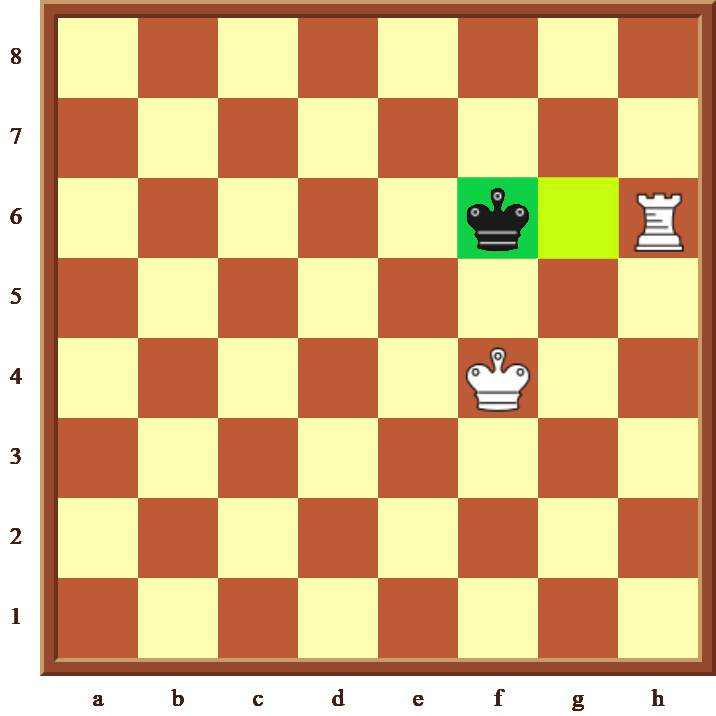
Just as we showed in the back-rank check mate where the King was blocked behind the pawns, we are doing a very similar blocking manoeuvre using our Rook and our King. Once the King reaches the edge of the board, there is nowhere left to run and we can easily check mate and win the game.